
Creating an API key for the Celera desktop client
In order to have the Celera desktop client correctly connect to your account, you need to prepare an API key that will be used to securely access your information and upload invoices in Celera on your behalf.
Accessing the API keys section
The API keys section is available within your user profile page.
To access your user profile page, while on any other page, click on your username in the top right corner of the page (1) and then select “Profile” (2):
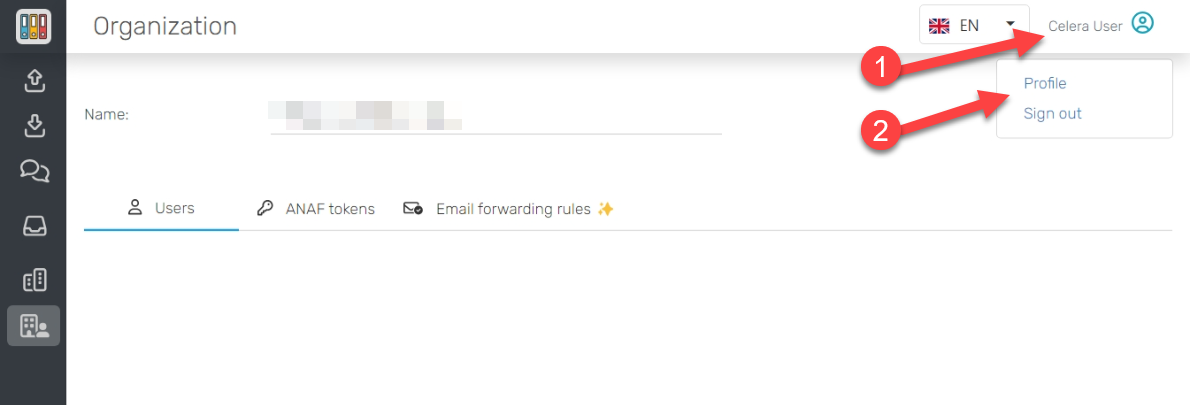
Accessing your user profile page
Issuing a new API key
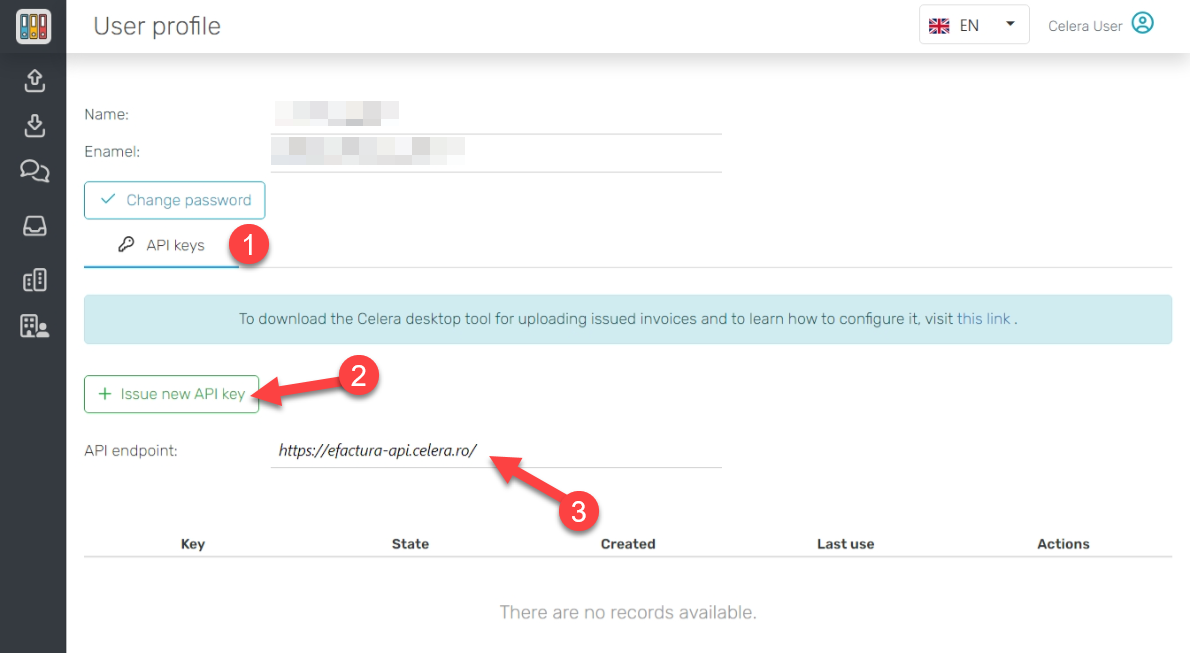
In order to issue a new API key, first make sure you have the “API keys” section active on your user profile page (1), then press the “Issue new API key” button (2).
Also, make a note of the API endpoint value (3), you will need it in order to point the Celera desktop client to the right API endpoint address.
Adding a new API key
Within the dialog that is presented, press the “Add new API key” button. A new key will be generated and displayed.
You can only have three API keys active at the same time. In case you need to issue more API keys, you first need to revoke an existing and active API key first.
Copy the API key (1) and, more importantly, the secret key (2). The secret key will be encrypted on the server side and will not be available for display after the dialog is closed, so make sure you have pasted it in a text file using for example Windows Notepad.
Once you check the confirmation checkbox (3), you can close the dialog and the new API key will be shown in the API keys list.
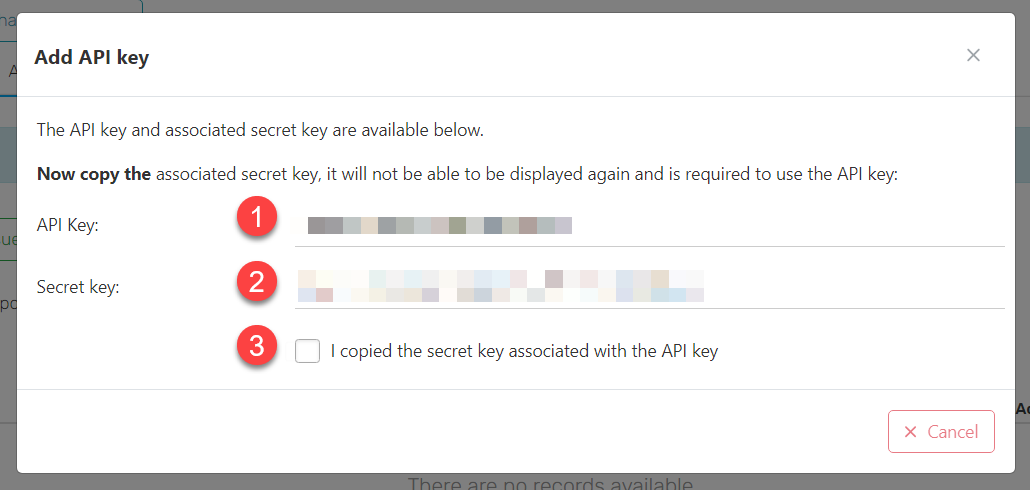
The new API key and its corresponding secret key are displayed
You can then use these keys, alongside the API endpoint value to configure the connection between the Celera desktop client and the Celera application.